After plastering is completed, many people assume the work is finished. However, one of the most important stages begins immediately afterwards—curing. Proper plaster curing helps cement gain strength, reduces shrinkage cracks, improves bonding, and increases the overall durability of the plastered surface.
If you are building a house, supervising construction, or checking the quality of work at your site, you may be wondering: How many days should plaster curing be done?
The short answer is that plaster should generally be cured for at least 7 days, while 10–14 days is often recommended for better strength and reduced cracking. In this guide, we explain the ideal plaster curing duration, watering frequency, curing methods, weather considerations, and common mistakes to avoid.
Plaster Curing at a Glance
| Question | Quick Answer |
| Minimum curing period | 7 days |
| Preferred curing period | 10–14 days |
| When to start curing | About 24 hours after plastering |
| Watering frequency | 2–4 times daily |
| Can rain replace curing? | No |
| Best practice | Keep plaster continuously moist |
Quick Answer: How Many Days Should Plaster Curing Be Done?
The recommended plaster curing period depends on site conditions, weather, and the location of the plaster. While many residential projects follow a minimum curing period of 7 days, extending curing to 10–14 days often delivers better long-term performance.
Recommended Plaster Curing Duration
| Type of Work | Recommended Curing Period |
| Cement-sand plaster | Minimum 7 days |
| Better quality curing | 10–14 days |
| Hot and dry weather | Up to 14 days |
| External plaster exposed to the sun | 10–14 days |
Key Takeaway:
For most residential projects, plaster should be cured for at least 7 days, while 10–14 days is preferred for better strength, improved bonding, and reduced risk of shrinkage cracks.
Why Is Plaster Curing Important?
Plaster is made using cement, sand, and water. Once applied to a wall or ceiling, the cement needs moisture to complete a chemical process called hydration. This process helps the plaster gain strength and durability over time.
When curing is neglected, the plaster can dry too quickly. Rapid moisture loss often leads to shrinkage cracks, weak bonding, surface dusting, and reduced lifespan.
Benefits of Proper Plaster Curing
| Without Proper Curing | With Proper Curing |
| Cracks may develop | Better crack resistance |
| Lower strength | Higher strength |
| Poor finish | Better finish |
| Reduced durability | Longer life |
Proper curing is one of the simplest and most cost-effective quality control measures during house construction. In many residential projects, plaster quality is judged by the cement brand or plaster mix, but curing often has a bigger impact on long-term performance than homeowners realise. Even a well-designed plaster mix can perform poorly if adequate curing is not provided.
If you’re planning plaster work, it’s also important to follow the correct plaster thickness. You can refer to our detailed guide on Plaster Thickness for Internal & External Walls for recommended thickness standards and best practices.
When Should Plaster Curing Start?
Timing is important. Starting too early can damage freshly applied plaster, while starting too late can reduce the effectiveness of curing.
In most residential construction projects, curing should begin approximately 24 hours after plastering, once the plaster has achieved its initial set.
As a practical rule:
- Allow the plaster surface to harden initially.
- Begin gentle watering after about 24 hours.
- Continue curing regularly throughout the recommended curing period.
The goal is to keep the plaster moist without washing away or damaging the fresh surface.
How Many Times Should Water Be Applied Daily?
One of the most common questions on construction sites is how frequently water should be applied during plaster curing.
The answer depends largely on temperature, wind conditions, and exposure to direct sunlight.
Typical Recommendation
| Weather Condition | Watering Frequency |
| Normal weather | 2–3 times per day |
| Summer | 3–4 times per day |
| Extremely hot conditions | More frequent as required |
Rather than focusing only on the number of times water is applied, focus on the objective: keeping the plaster surface continuously moist throughout the curing period.
If the wall dries out completely between watering cycles, the effectiveness of curing is reduced.
Best Methods for Plaster Curing
Several plaster curing methods are used in residential construction. The most suitable option depends on the size of the project, accessibility, and site conditions.
Method 1: Manual Water Sprinkling
This is the most common method used in small and medium-sized residential projects.
Advantages:
- Simple and economical
- Requires minimal equipment
- Suitable for most house construction projects
Limitations:
- Labour dependent
- Quality varies depending on worker supervision
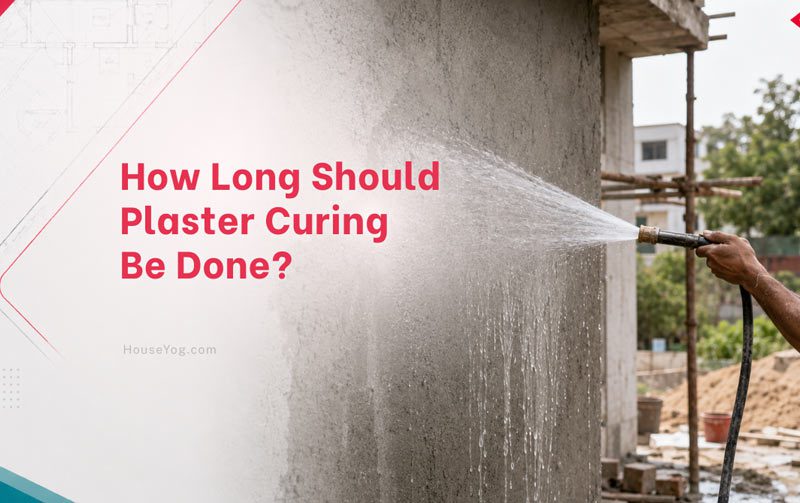
Method 2: Pipe and Hose Curing
For larger projects, water can be applied using pipes and hoses.
Advantages:
- Faster coverage
- Suitable for large wall surfaces
- More efficient than manual bucket watering
Even when using hoses, someone should regularly check that all wall surfaces are receiving enough water.
Method 3: Wet Hessian Cloth or Jute Covering
Some locations are difficult to cure using direct water application.
Wet hessian cloth, jute bags, or similar moisture-retaining coverings can be used effectively for:
- Columns
- Beams
- Narrow wall sections
- Hard-to-reach areas
The cloth should remain continuously damp during the curing period.
What Happens If Plaster Is Not Properly Cured?
Poor curing is one of the most common reasons for plaster-related defects in residential buildings.
1. Surface Cracks
Insufficient curing often causes shrinkage cracks as moisture evaporates too quickly from the plaster surface.
If you are already seeing cracks in your walls, read our detailed guide on Why Wall Plaster Cracks: Causes, Prevention & Repair Tips.
2. Reduced Strength
Without adequate moisture, cement cannot complete hydration properly. As a result, the plaster remains weaker than intended.
3. Hollow-Sounding Plaster
Poor bonding between plaster and masonry can sometimes lead to hollow patches that produce a hollow sound when tapped.
4. Poor Bond With Masonry
Rapid drying may reduce adhesion between the plaster layer and the wall surface.
5. Shorter Service Life
Walls that are not cured properly are generally more vulnerable to cracking, deterioration, and maintenance issues over time.
Plaster Curing for Internal vs External Walls
Internal and external walls experience different environmental conditions. External walls are exposed to direct sunlight, wind, and higher temperature variations, which increase moisture loss.
| Factor | Internal Walls | External Walls |
| Sun exposure | Low | High |
| Water loss | Slower | Faster |
| Recommended curing | Minimum 7 days | Preferably 10–14 days |
Because external walls dry faster, extending the curing duration often provides better protection against future cracks and durability issues.
Does Weather Affect Plaster Curing?
Weather plays a major role in determining how quickly moisture evaporates from freshly plastered surfaces.
Summer
Hot weather accelerates evaporation.
As a result:
- More frequent watering is required.
- External walls need closer monitoring.
- Extended curing periods are often beneficial.
Monsoon
Higher humidity levels naturally reduce moisture loss.
However:
- Do not assume rainfall alone provides adequate curing.
- Covered or sheltered areas may still require regular watering.
- Check that all plaster surfaces remain sufficiently moist.
Winter
Plaster dries more slowly during cooler weather.
Even though moisture loss is reduced, the recommended curing period should still be followed to allow proper cement hydration and strength development.
Suppose an external south-facing wall is plastered during May in Kolkata or any other hot Indian city. Direct sunlight can cause the surface to lose moisture very quickly. In such cases, curing only once or twice a day may not be sufficient. More frequent watering and extending curing closer to 14 days can significantly reduce the risk of shrinkage cracks.
Architect’s Insight: Why Many Plaster Cracks Are Actually Curing Problems
In many residential projects, cracks are blamed on poor plaster quality, low-grade cement, or workmanship issues. While these factors can certainly contribute, inadequate curing is often the real culprit.
Even a properly proportioned plaster mix can develop shrinkage cracks if it loses moisture too quickly after application. On-site inspections frequently reveal that curing was stopped after only two or three days, especially when labour supervision is weak.
From a cost-benefit perspective, extending curing from 7 days to 10–14 days is one of the most affordable ways to improve plaster quality. Compared to the cost of future repairs, repainting, or crack treatment, proper curing is a small investment with significant long-term benefits.
If you notice cracks forming around openings, you may also find our guide, “Why Cracks Appear Near Doors and Windows in Walls,” helpful.
Common Plaster Curing Mistakes to Avoid
Many plaster defects can be traced back to avoidable mistakes during curing. Paying attention to these simple details can significantly improve the quality and durability of your walls.
Some of the most common mistakes include:
- Starting curing too early and disturbing fresh plaster
- Delaying curing for several days after plastering
- Stopping curing after only 2–3 days
- Watering only once daily during hot summer weather
- Ignoring external walls exposed to direct sunlight
- Assuming rain alone is sufficient for curing
- Failing to monitor hard-to-reach areas
Consistent curing is far more important than occasional heavy watering.
Frequently Asked Questions
Yes, 7 days is generally considered the minimum recommended curing period for cement plaster. However, if weather conditions are hot and dry, or if the plaster is exposed to direct sunlight, extending curing to 10–14 days can provide better strength development and reduce the likelihood of shrinkage cracks.
Yes. Inadequate curing is one of the most common causes of plaster cracks. When moisture evaporates too quickly, the plaster can shrink and develop cracks. Poor curing may also reduce strength and affect bonding between the plaster and the wall surface.
Plaster curing usually begins about 24 hours after plaster application, once the surface has achieved its initial set. Starting too early may damage fresh plaster, while delaying curing can reduce the effectiveness of the hydration process.
In normal weather conditions, watering 2–3 times per day is generally sufficient. During summer or very hot conditions, 3–4 applications may be necessary. The main objective is to keep the plaster surface continuously moist throughout the curing period.
Rain can help maintain moisture levels, but it should not be considered a complete substitute for proper curing. Sheltered walls, covered areas, and uneven rainfall patterns may leave some surfaces insufficiently cured. Regular monitoring is still important.
Wall putty should generally be applied only after the recommended curing period is completed and the plaster surface has dried adequately. Depending on weather conditions, contractors often wait several additional days after curing before starting putty work to avoid moisture-related issues.
Conclusion
Plaster curing is one of the most important yet frequently overlooked stages of house construction. While a minimum curing period of 7 days is generally recommended, 10–14 days often provides better strength, improved bonding, and greater resistance to cracks. Curing should normally begin around 24 hours after plastering, and the surface should be kept continuously moist throughout the curing period.
The exact watering frequency depends on weather conditions, wall exposure, and site circumstances, but consistency is essential. Whether you are constructing a new home or supervising renovation work, proper plaster curing is a small effort that can significantly improve wall quality, durability, and long-term performance. In many cases, preventing cracks starts not with expensive repairs, but with disciplined curing practices immediately after plastering.
Popular on Houseyog Right Now!:
")

")


