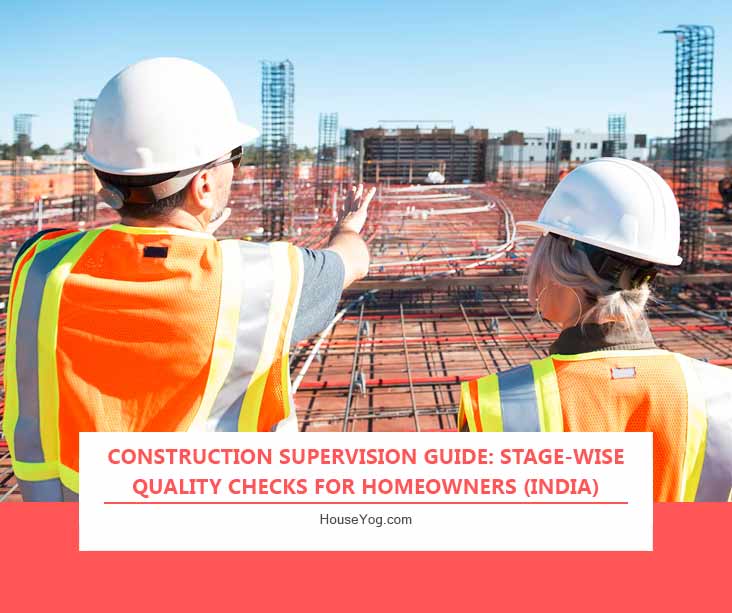
How to Supervise House Construction Yourself and Prevent Contractor Mistakes
Building a house is a once-in-a-lifetime experience for most families in India. But once the drawings are ready and construction begins, many homeowners feel overwhelmed. They depend heavily on the contractor’s honesty and skill, yet the contractor may not always follow best construction practices unless supervised properly.
While many people hire professionals for design, very few hire engineers for full-time construction supervision. As a result, homeowners often carry the responsibility of monitoring the quality of work, even when they don’t have technical knowledge.
This in-depth guide is created to make self-supervision of house construction easier for homeowners who do not have access to a site engineer. It explains what to check at each stage, how to prevent common contractor shortcuts, and how to ensure your construction is done safely and correctly.
If you’re building a home without an engineer or planning to supervise your site personally, this guide will serve as your essential, stage-wise construction supervision checklist.
If you haven’t already, you can also explore our Home Construction Checklist to plan your project better before supervision begins.
Why Homeowners Need a Stage-Wise Construction Supervision Checklist
Most Indian homeowners build their houses through local contractors under either labour-only or labour + materials contracts. With no architect or engineer monitoring daily progress, there is a high chance of:
Wrong reinforcement placement
Incorrect concrete mix proportions
Poor brickwork alignment
Leakage-prone plumbing
Unsafe electrical wiring
Skipping curing
Overuse or underuse of materials like rebars, sand and cement
Hidden shortcuts to cut labour & costs that affect structural safety
A structured house construction supervision guide helps you stay in control, avoid costly mistakes, and ensure the long-term safety of your home. This guide simplifies construction into clear quality checks for each stage of construction, so even a first-time homeowner can supervise work confidently.
What Construction Supervision Really Means (In Simple Terms)
Before we begin the stage-wise checklist, let’s clarify what supervision actually involves. Construction supervision is not about doing the contractor’s job—it’s about ensuring:
The work follows drawings
Materials are genuine and used correctly
Labour is not taking shortcuts
Dimensions and levels are accurate
Structural safety is never compromised
Finishing quality meets expectations
Your role is to observe, verify, and document every activity, not to replace the engineer and technicians. Even basic knowledge empowers you to prevent 90% of common construction mistakes people make in India.
Pre-Construction Stage – Supervision Checklist
Pre-construction is one of the most underestimated phases of house construction supervision, yet it sets the foundation for everything that follows. Most people think construction begins with digging, but the most costly errors often occur before the first shovel hits the ground.
Incorrect layout markings, poor soil assessment, or mismatched measurements can lead to misalignment, structural load issues, and regulatory violations later.
This is why every homeowner should follow a thorough, stage-wise pre-construction quality checklist to ensure the layout, foundation lines, soil conditions, and materials are correct from day one.
Here’s what’s involved in the pre-construction quality checks:
Verify Plot Measurement & Boundary Marking
Even reputable contractors sometimes mark the layout loosely. But your job at this stage is to ensure:
Plot dimensions match the deed
Boundary lines respect setbacks
Road-facing orientation is correct
Neighbour boundaries are undisturbed
A small marking error can throw off room sizes and overall building alignment.
Building Layout Marking
The contractor should mark:
Centerlines
Column grid points
External wall boundaries
Footing locations
Cross-check dimensions using a measuring tape or laser measurer to ensure everything is right and as per the plans and drawings.
You don’t need a geotechnical report unless the soil is doubtful.
Here are the basic observations you can do on your own:
Very loose sand? → deeper footing needed
Clayey soil? → prone to swelling
Water table shallow? → additional waterproofing required
Material Storage & Quality
Before work starts:
Cement should be stored in a dry area
Sand must be clean, free from clay
Steel should be rust-free
Bricks must be purchased from a reliable supplier
Poor material quality early on weakens the structure permanently. So be very careful about material quality and ensure the best in your budget.
By completing these pre-construction checks, you set a strong foundation for smooth execution and reduce the risk of errors that are costly to correct later.
Pro Tip: Always verify plot dimensions with your own measurements, even if the contractor has already marked the layout. A small marking error of just a few inches can distort room sizes and wall alignment for the entire building.
Once your site layout, soil assessment, and material readiness are confirmed, the construction finally moves into the ground. The next phase, excavation and foundation, is where structural safety truly begins. This stage demands close supervision because errors made here become permanent and affect every floor built above it.
Stage 1: Excavation & Foundation
The foundation is the backbone of your home, making this stage one of the most critical phases of house construction supervision. Any error in excavation depth, footing reinforcement, soil compaction, or concrete mix can compromise the building’s long-term stability. This section outlines essential footing and foundation quality checks to ensure a safe, durable base for your entire structure.
Excavation Checklist (Stage 1 Construction Quality Checks)
Depth matches structural drawings
No soft or loose soil left at the bottom
Water is drained properly (if groundwater appears)
Excavated pit sides are stable
Pro Tip: Take photos of all excavation depths before PCC is poured. This acts as documentation in case of disputes and helps ensure that the contractor meets the structural engineer’s required depth.
This is one of the most critical supervision tasks.
Look for:
Correct steel diameter and spacing
Proper binding wire use
Adequate cover blocks (25–50mm)
No overlapping mistakes
Straight alignment
Poor reinforcement = weak structural stability.
Pro Tip: Count the number of steel bars and measure their diameters using a simple vernier calliper or by visual comparison. Contractors sometimes substitute smaller-diameter bars to cut costs.
Footing Shuttering & Formwork Checklist
Shuttering must be:
Tight and clean
Leak-proof
Properly supported
Footing Concrete Pouring Checklist
If site-mixed:
Cement proportion must be consistent
Water should be measured, not added randomly
The vibrator must be used
If RMC:
Check slump
Ensure continuous pouring
Pro Tip: Never allow concrete to be poured in layers with long gaps. This creates weak “cold joints” that reduce slab strength.
Curing
Footing must be cured for a minimum of 7 days.
Foundation Stage – Common Red Flags to Watch Out For
Honeycombing
No cover blocks
Excess water in the mix
Uneven footing depth
No curing
Stop work immediately if you see these issues.
Note: If you notice any of these red flags during foundation work, pause construction and consult an engineer immediately. Issues at this stage cannot be corrected later without major reconstruction.
Proper supervision during excavation and foundation ensures the structural stability of the entire house and prevents long-term settlement issues.
Master Pro Tip:For all structural stages (foundation, columns, beams, slabs), try to get at least one site visit by a structural engineer or an experienced civil supervisor, even if it’s a paid review. A single expert inspection can prevent mistakes worth lakhs.
After the foundation is completed and properly cured, the project moves vertically with the RCC framework. This is one of the most technical phases of the entire construction process, and it requires careful supervision to ensure the structural skeleton of the building is strong and safe.
Stage 2: RCC Columns, Beams & Slab
RCC work defines the strength and safety of your building. Proper reinforcement placement, accurate shuttering, correct concrete ratios, and adequate curing are non-negotiable. This stage requires a sharp eye for detail and structured supervision, especially if you’re managing construction without an engineer. Below is your RCC quality check checklist for columns, beams, and slabs.
Pro Tip: Check lap lengths carefully. Incorrect lapping is one of the most common and most dangerous mistakes in RCC work. The lap should typically be 40–50 times the bar diameter.
Column Shuttering & Formwork Checklist
Must be properly aligned
No bulging or gaps
Well supported
Column Concrete Pouring Checklist
Use a vibrator to remove voids
Ensure proper height
Begin curing as soon as the shuttering is removed
Beam Reinforcement Quality Checklist
The top & bottom steel must match the design
Hooks and bends are aligned correctly
Chairs used to maintain cover
Slab Reinforcement Checklist
Steel spacing accurate
Cover blocks are used on all sides
Electrical conduits are placed before concreting
Plumbing sleeves installed appropriately
Pro Tip: Before slab concrete is poured, walk the entire slab and visually inspect that electrical conduits and plumbing sleeves are placed correctly. Once concrete is poured, correcting these mistakes becomes extremely costly.
Slab Concreting & Finishing Checklist
Should be poured in one continuous operation
Proper levelling and vibration
Minimum 7–14 days curing
RCC Stage – Common Red Flags to Avoid
Exposed steel
Honeycombing in beams/columns
Weak shuttering support
Overly wet concrete
Skipped curing
These mistakes severely reduce structural strength. Proper supervision during RCC ensures that the structural skeleton of your home remains strong, durable, and safe for decades.
Once the RCC frame is stable, the construction shifts to building the walls. Brickwork or blockwork defines the layout, room dimensions, and plaster finish. This is where precision in alignment and workmanship becomes extremely important.
Stage 3: Brickwork / Blockwork
Brickwork defines the accuracy of room sizes, wall alignment, and the quality of your final finish. Poor workmanship here creates endless issues later — from cracks to uneven plastering. That’s why brickwork demands a clear brickwork quality checklist and careful stage-wise supervision.
Brick Quality Checklist
Should make a ringing sound when struck
Uniform in size
Must be soaked for 20 -30 minutes before use
Mortar Mix Quality Checklist
Common mix: 1:4 or 1:5 Avoid very watery or very dry mortar.
Wall Alignment & Plumb Line Checklist
Check verticality using a plumb bob
Horizontal level using a spirit level
Uniform joint thickness
Door & Window Openings
Verified according to drawings.
Curing for Brickwork
The walls must be cured for at least 7 days.
Brickwork Stage – Common Red Flags
Walls not straight
Joints too thick or too thin
Unsoaked bricks
Cracks in fresh brickwork
Accurate brickwork supervision helps avoid cracks, misalignments, and finishing defects, ensuring a clean and long-lasting surface for plastering.
Pro Tip: Ask the mason to stretch a taut string line at the top of every brick course. This ensures that walls remain straight and avoids the need for excessive plaster correction later.
With brickwork and columns in place, the next major milestone is roof slab casting. This stage integrates reinforcement, plumbing sleeves, electrical conduits, and waterproofing preparations, making supervision critical to avoid leakage and structural defects.
Stage 4: Roof Slab Casting
Roof slab casting is a major milestone that demands precision and careful quality monitoring. Errors in reinforcement placement, shuttering or concrete compaction can lead to long-term leakage and durability issues.
Following slab casting quality checks ensures your roof remains structurally solid and waterproof.
Roof Slab Casting Quality Checklist
Reinforcement placed correctly
Electrical conduits laid
Plumbing outlets positioned
Shuttering stable
Concrete compacted properly
Water curing done
Avoid slab casting on extremely hot afternoons.
A well-supervised roof slab not only improves structural strength but also safeguards your home against future leakage and waterproofing problems.
After structural work is completed, construction enters the finishing phase. This is where the quality of workmanship becomes clearly visible. Proper plastering, smooth flooring, and neat tile work depend on accurate supervision and attention to detail.
Stage 5: Plastering, Flooring & Finishing
Finishing work is where your home’s look, feel, and final quality become visible. Smooth plaster, level flooring, proper tile slopes, and good painting largely depend on careful supervision. This section provides a finishing stage quality checklist to ensure your home is aesthetically appealing and free from future defects.
Plastering & Wall Finishing Checklist
Even and smooth surface
No cracks
Good curing
Sharp edges for corners
Flooring & Tiling Quality Checklist
Tile alignment
Correct slope in bathrooms
No hollow sound when tapped
Straight grout lines
Pro Tip: Check bathroom tile slopes using a mug of water before grouting. Water should naturally flow toward the drain without puddling. Fixing slope issues after tiling is difficult and expensive.
Painting Supervision
Wall putty applied properly
Primer used
Minimum two coats of paint
Good finishing supervision enhances the aesthetics and durability of your home while preventing visible defects after handover.
Before you close walls and floors permanently, plumbing must be inspected thoroughly. This hidden system requires stage-wise supervision because mistakes made now will be extremely expensive to fix later.
Stage 6: Plumbing Supervision
Plumbing is a hidden system, but mistakes here are expensive and frustrating to fix later. Leaks, poor slopes, and weak waterproofing are the most common construction issues in Indian homes.
This plumbing supervision checklist helps prevent these problems right during construction.
Plumbing Supervision Checklist
Use branded pipes (Astral, Supreme, Finolex)
Pressure testing before tile installation
Proper slopes for drainage
Waterproofing in bathrooms
24–48 hours pond test
By supervising plumbing carefully, you reduce the risk of leaks and blockages, ensuring a reliable water supply and drainage for years to come.
Pro Tip: Never allow concealed plumbing lines to be covered until after pressure testing. Insist on a proper 24–48 hour pressure test to catch leaks early.
Once the plumbing lines are secured, the electrical setup can be laid out safely. This is another invisible but essential system where careful supervision can prevent serious safety hazards.
Electrical wiring is one of the most safety-critical aspects of construction. Faulty circuits, weak earthing, or poor conduit planning can cause fire hazards and recurring electrical issues.
This electrical quality check guide ensures your wiring is safe, durable, and future-proof.
Electrical Wiring & Safety Checklist
ISI-certified wires are being used
Conduit alignment is right
Load distribution in DB
Earthing system
Correct switch and socket height
Proper electrical supervision ensures safety, prevents fire hazards, and guarantees that your electrical layout is functional and future-ready.
Pro Tip: Before finalizing switchboard positions, stand in the actual room and visualise usage. Ensure switches are placed at convenient heights and locations to avoid usability issues.
Contractor Red Flags – How to Know If Work Is Being Compromised
Homeowners often ask:
How do I know if the contractor is doing good work?
Watch out for:
Excess water in concrete
Skipped curing
Cheaper materials substituted
Rushed RCC pouring
Not following the drawings
No measurements taken
Inconsistent workmanship
Document all concerns and address them immediately.
Cost-Control Tips While Self-Supervising Construction
Avoid unnecessary expenses by:
Storing materials properly
Reviewing daily progress
Avoiding last-minute design changes
Measuring work done
Buying materials in bulk
Final Completion & Handover Checklist
Before taking handover:
Test plumbing
Check electrical points
Inspect flooring
Verify paint finish
Look for dampness
Ensure proper slope on the terrace
Match room sizes with drawings
FAQs
1. How can I supervise house construction myself?
You can supervise house construction yourself by following a stage-wise construction supervision checklist. This includes verifying layout marking, checking foundation depth, monitoring RCC reinforcement, inspecting brickwork alignment, ensuring proper curing, and supervising plumbing and electrical work before walls are closed. Regular site visits and photo documentation help prevent contractor mistakes and ensure quality control at every stage.
2. What are the most important quality checks during house construction?
The most important construction quality checks include: Correct footing depth and PCC thickness Proper reinforcement placement in columns, beams, and slabs Concrete mix ratio accuracy Brickwork alignment and joint thickness Waterproofing tests in bathrooms and on the terrace Pressure testing of plumbing lines Electrical earthing and load distribution Checking these at the right time helps prevent structural issues, leakage, and safety hazards.
3. How do I know if my contractor is doing good work?
A contractor is doing good work if: Reinforcement matches drawings No shortcuts are taken in mixing or curing Shuttering is aligned and leak-proof Material quality matches what you paid for Plumbing and electrical lines are tested before concealment Measurements match the plan Workmanship is consistent and documented Any deviation, especially in RCC stages, is a red flag.
4. What are the common construction contractor shortcuts in India?
Common contractor shortcuts include: Using less cement or smaller steel bar diameters Adding excess water to concrete Skipping curing Not using cover blocks Using unsoaked bricks Rushing slab casting Avoiding pressure testing of plumbing These shortcuts compromise structural strength and long-term durability.
5. What should I check before pouring concrete?
Before pouring concrete, check: Steel bars are tied correctly with proper spacing Cover blocks are placed Shuttering is tight and stable Electrical conduits and plumbing sleeves are in position Concrete mix ratio is correct Vibrators are available for compaction These checks ensure a strong RCC and prevent honeycombing.
6. What should I look for during brickwork?
During brickwork, check: Bricks make a ringing sound when tapped Bricks are soaked properly Mortar mix is consistent (1:4 or 1:5) Walls are straight and plumb Joint thickness is uniform Openings match the drawing Correct brickwork prevents cracks, misalignment, and excessive plaster consumption.
7. How do I supervise home construction without an engineer?
To supervise construction without an engineer: Follow a stage-wise supervision checklist Visit the site during critical stages like footing, RCC, brickwork, slab casting Take measurements frequently Ask for photos and videos when not present Get occasional review visits from a civil engineer (if possible) Verify all materials before use This approach ensures quality even with self-supervision.
8. How often should a homeowner visit the construction site?
A homeowner should visit the site: Daily during RCC stages Every 2–3 days during brickwork and plastering Before tile laying Before electrical and plumbing concealment Frequent visits significantly reduce the chance of errors or shortcuts.
9. What are the most important plumbing quality checks?
Important plumbing quality checks include: Using branded pipes (Astral, Finolex, Supreme) Correct pipe slopes Pressure testing for leaks Proper bathroom waterproofing Avoiding concealed joints These checks prevent leakage, dampness, and long-term repair costs.
10. What electrical checks should be done during construction?
Electrical supervision should ensure: ISI-certified wires are used Proper load distribution across circuits Correct earthing Well-aligned conduits without sharp bends Convenient switch heights DB panel is installed safely These checks ensure fire safety and long-term electrical reliability.
11. How can I avoid getting cheated by a contractor?
To avoid getting cheated: Measure all work (don’t rely on verbal claims) Verify steel sizes and material brands delivered to site Insist on curing and testing at every stage Keep written communication (WhatsApp is fine) Release payments only after stage completion Hire an external engineer for periodic inspections if possible Transparency and supervision are your best protection.
12. What are the biggest construction mistakes homeowners make?
Big mistakes include: Not checking the layout marking Not supervising RCC stages Ignoring curing Choosing cheap materials Allowing plumbing concealment without testing Not verifying slopes in bathrooms Relying completely on the contractor without supervision Avoiding these mistakes ensures a safe and durable home.
Over to You
Supervising house construction without an engineer is challenging but entirely possible with the right stage-wise construction supervision checklist.
When you know what to look for, you can easily prevent 90% of the common mistakes contractors make, from reinforcement errors to poor waterproofing and inadequate curing.
Use this guide as a practical reference throughout your construction journey. It ensures safer workmanship, better quality, and long-term durability for your dream home.
If you found this guide helpful, please consider sharing it with anyone who is planning to build a home, it may save them from costly construction mistakes.
And if you want expert help with planning, designing or executing your project, the Houseyog team would be happy to assist.
")
")

: Column, Beam & Slab Casting Rates")
")

: Slab, Beam & Column Centering Rates")