
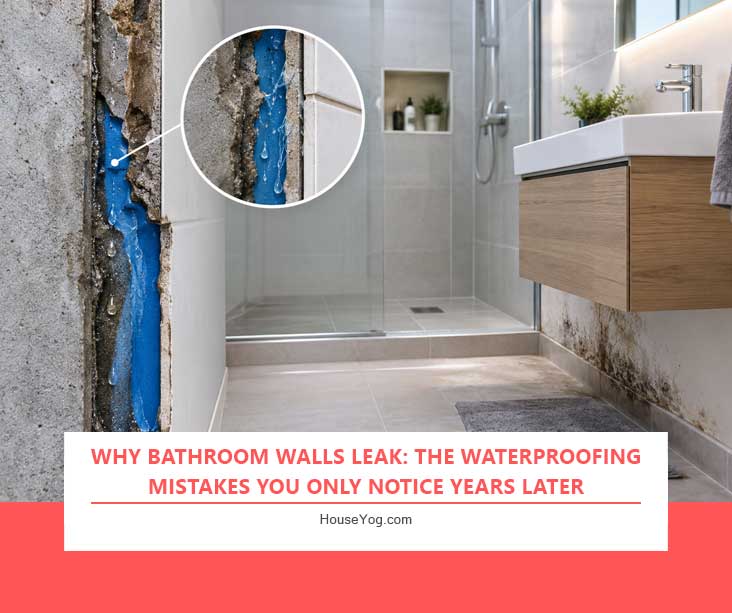

A bathroom leak rarely announces itself.
Usually, there’s no burst pipe, no puddle on the floor, and no obvious moment when something goes wrong. Instead, a faint damp patch appears on the other side of a wall. Paint starts bubbling near the skirting. A cupboard begins to smell musty. Sometimes the first sign is mould that keeps returning despite repeated cleaning.
By then, moisture may already be reaching parts of the wall you cannot see.
This is what makes bathroom waterproofing different from many other parts of house construction. Plumbing can be pressure-tested, and electrical wiring can be traced, but waterproofing is eventually hidden behind tiles, plaster or other finishes. Once the bathroom is finished, it becomes difficult and expensive to inspect what was done underneath.
The good news is that most of the important checks can be made before the tiles go on.
Bathroom waterproofing is not simply about applying a waterproofing product to a wall. The substrate, membrane, corners, wall-to-floor junctions, pipe penetrations and other details all have to work together.
Waterproofing is also one of the construction costs that homeowners tend to underestimate because most of the work disappears beneath the finished surface. If you’re planning the budget for a new bathroom or renovation, it’s worth understanding bathroom waterproofing costs before work begins.
Here are some of the waterproofing mistakes that can eventually show up as leaking or damp bathroom walls—and what you as a homeowner can check while the work is still visible.
Tiles Are Not the Waterproofing Layer
One of the most common misunderstandings is that a well-tiled bathroom is automatically waterproof.
It isn’t.
Ceramic and porcelain tiles are generally resistant to water, but the joints between them are a different matter. Many conventional cement-based grouts are porous and can allow moisture to pass through. Even where low-absorption tiles and improved grout systems are used, the finished tile surface should not be treated as a substitute for a properly designed waterproofing system.
The tiles are the finished surface. The waterproofing behind them is what protects the underlying wall and building structure from moisture.
That distinction matters.
If someone says, “Don’t worry, the tiles and grout will stop the water,” the more useful question is: What waterproofing system is behind the tiles?
A bathroom may have excellent-looking tiles and still develop dampness if the waterproofing underneath is missing, damaged, poorly applied or badly detailed.
The exact waterproofing method can vary with the construction, substrate and product system. What matters is that the wet area has a continuous, compatible waterproofing treatment designed for that application.
Waterproofing Does Not Extend Far Enough
Water does not always stay where you expect it to.
In a shower area, water can splash sideways, run down walls and collect at corners and junctions. Outside the immediate shower zone, wet floors, overflowing buckets, cleaning water and general bathroom use can also expose parts of the room to moisture.
That is why simply applying waterproofing to a small patch behind the shower fitting may not be enough.
The extent and height of waterproofing should follow the project specification, applicable requirements and the manufacturer’s instructions for the particular waterproofing system. There is no single height that can safely be prescribed for every bathroom and every product.
The practical question for a homeowner is simpler:
Which parts of this bathroom are expected to get wet, and does the waterproofing cover those areas appropriately?
The shower enclosure normally deserves particular attention. But don’t assume that everything outside the shower can automatically be treated as a dry area.
Some bathrooms have masonry walls, some use different types of boards or panels, and some older buildings have sunken toilet arrangements or other construction details. The waterproofing approach should suit the actual construction rather than following a one-size-fits-all rule.
The Wall-to-Floor Junction Was Poorly Detailed
If you want to inspect one area particularly carefully, look at the junction where the wall meets the bathroom floor.
This is an important transition because two surfaces meet there, construction work from different stages often comes together, and water naturally collects near the floor.
A waterproofing system should provide a continuous and properly detailed transition between the floor and wall. Depending on the system, this may involve compatible reinforcing tapes, bands, coves, fillets or other proprietary details designed to accommodate movement and maintain continuity.
What you do not want is a situation where the wall waterproofing simply stops at the corner, and the floor treatment begins separately, with no properly detailed connection between them.
This is one of those details that can look insignificant when the work is being done but become very difficult to correct once the tiles are installed.
Ask to see the wall-to-floor junction before tiling starts.
You should be able to see that the corner has been deliberately treated as part of the waterproofing system, rather than simply being a meeting point between two surfaces.
Pipe and Fixture Penetrations Were Not Sealed Properly
Every pipe, mixer, shower arm, tap, niche or other fitting that passes through a waterproofed wall creates a potential weak point.
The problem is not the fitting itself. The problem is what happens where it penetrates the waterproofing.
A hole drilled through a finished waterproofing layer can compromise the system if it is not properly sealed. The same applies when fixtures are installed before the waterproofing has been properly detailed around them.
This is particularly important with concealed plumbing. Once the wall is tiled, you cannot easily see what has happened around the pipe entry points. If you’re building a new home, it is worth planning the bathroom plumbing carefully and understanding the cost of plumbing in a new house before the work begins.
Penetrations should therefore be sealed using a method compatible with the waterproofing system. Depending on the product and construction, this might involve a suitable sealant, collar, sleeve, gasket or other proprietary detail.
Don’t assume that a bead of silicone around the outside of a finished tap or fitting automatically solves the problem.
Before the wall is tiled, ask:
How are the pipe and fixture penetrations being waterproofed?
It is a small detail, but there may be several such penetrations in a single bathroom.
The Substrate Was Not Suitable for the Waterproofing System
A waterproofing system is only as reliable as the surface it is applied to.
The wall or backing material needs to be sound, suitably prepared and compatible with the waterproofing system. The manufacturer’s requirements for cleanliness, surface condition and moisture content also need to be followed.
This matters because different bathrooms can have very different substrates.
A conventional masonry wall with cement plaster is not the same as a lightweight board system. A newly plastered or rendered surface is not the same as an old, fully cured substrate. A surface covered in dust, loose material or contaminants is not the same as a properly prepared one.
One common mistake is to rush the waterproofing onto a surface that is not ready for it.
Another is using a backing board or other material that is not suitable for the intended wet-area application.
These problems are easy to miss once the tiles are installed.
Before work is covered, ask:
- What is the substrate behind the waterproofing?
- Is it suitable for this wet area?
- Has it been properly prepared?
- Does the waterproofing manufacturer’s specification permit application under the current moisture conditions?
- How long does the particular system need to cure before the next stage?
The answer will depend on the actual materials being used. That is precisely why asking for the product information and following its installation requirements matters.
Corners and Junctions Were Not Allowed to Move
Bathrooms contain a lot of rigid surfaces, but buildings are not completely rigid.
Small amounts of movement can occur because of temperature changes, drying and shrinkage, structural movement and movement between different materials. Waterproofing and finishing details therefore need to accommodate movement where necessary.
Internal corners are particularly important.
If a rigid finish is forced to bridge a joint that needs to move, cracking can occur. Once a crack develops, moisture can find a path behind the finished surface.
This is one reason internal corners and changes of plane are often treated differently from the flat tiled surface. Depending on the system, a flexible sealant or a purpose-designed movement detail may be used rather than filling every junction with rigid grout.
The exact detail should follow the waterproofing and tile installation system.
For the homeowner, the practical check is simple:
Don’t assume every corner should simply be filled with grout. Ask how movement at the corners and other junctions has been allowed for.
If you later notice recurring cracks or discolouration along a bathroom corner, don’t automatically treat it as a cosmetic problem. Persistent dampness around a cracked joint can be a sign that moisture is getting where it should not.
Too Many Joints Mean More Places to Maintain
There is another useful principle behind all of this: the more joints, corners and penetrations a wet-area finish has, the more details there are to get right and maintain.
A conventional tiled wall has many grout joints, plus corners, edges, service penetrations and changes of material.
That does not make tiles a bad choice. Tiles remain one of the most practical and repairable bathroom finishes, and they offer an enormous range of sizes, patterns and design options.
But there are ways to reduce the number of joints in the finished surface.
Large-format tiles can reduce grout lines compared with smaller tiles. Some wet-area wall-panel systems can reduce them further by covering larger areas with fewer pieces. For example, grout-free bathroom wall panels are designed to minimise the number of joints across the finished wall surface.
These options can reduce the number of surface joints, but they do not eliminate the need for proper waterproofing.
In fact, when there are fewer panels or sheets, the remaining joints and perimeter details become particularly important. They need to be installed, sealed and finished according to the system requirements.
So the decision should not be simply:
Tiles or panels—which is more waterproof?
A better question is:
Which finish suits the bathroom, and can it be installed with properly detailed waterproofing underneath and around it?
What to Check Before Bathroom Tiling Starts
You do not need to be a waterproofing specialist to make useful checks.
The most important thing is to ask the questions before the waterproofing disappears behind tiles.
Ask these questions:
Ask for the product name and, where appropriate, the manufacturer’s technical information or installation instructions.
Don’t just ask whether the bathroom is waterproofed. Ask where the waterproofing starts and ends, particularly around the shower and other regularly wet areas.
Ask how continuity is maintained between the floor and wall waterproofing and what corner detail is being used.
Check how pipes, mixers, shower fittings and other penetrations are being integrated into the waterproofing system.
Find out what is behind the waterproofing and whether it is suitable for the particular wet-area application.
The waterproofing system will have requirements for the condition and preparation of the substrate. These should be followed rather than relying on a generic “clean and coat” approach.
Do not assume that “two coats” or any other fixed number applies to every product. Follow the manufacturer’s specified application and curing requirements.
Ask how movement and transitions are being handled rather than assuming that all joints should simply be grouted.
Once tiles are installed, many of these details become impossible to inspect without removing the finish.
You can also take photographs.
Photograph the full waterproofed area before it is covered, and take closer photographs of corners, wall-to-floor junctions, pipe penetrations and other important details.
It takes only a few minutes, but those photographs can become valuable records later if there is a question about how the bathroom was constructed.
Test and Photograph the Waterproofing Before It Is Covered
A visual inspection is useful, but it is not the whole story.
Where the waterproofing system, project specification or applicable practice calls for testing, the waterproofed area should be tested and inspected before the tiles or other finishes conceal it.
The exact test method and requirements depend on the construction and waterproofing system, so homeowners should not rely on a universal test duration or assume that every membrane is tested in exactly the same way.
The important principle is this:
Test and inspect the waterproofing while it is still accessible.
This is also the right time to check for obvious gaps, damage, incomplete coverage, poorly treated corners or unsealed penetrations.
And take photographs before the next layer of work begins.
For a homeowner, this creates a simple record of something that would otherwise disappear permanently behind the finished bathroom.
If a contractor or waterproofing applicator provides a completion or testing record, keep that with your house construction documents as well.
What to Remember
Bathroom waterproofing is one of those parts of house construction where the quality of the work becomes harder to judge as the room gets closer to completion.
Once the tiles are installed, the membrane, corners, junctions and many of the pipe penetrations are hidden.
That is why the best time to think about a bathroom leak is before there is one.
Don’t judge waterproofing by how good the finished tiles look. Ask what is underneath them, how the wet areas have been treated, how corners and penetrations have been detailed, and whether the work was inspected before it was covered.
Good waterproofing is not simply about buying a good product.
It is about using the right system, preparing the surface properly, detailing the difficult junctions and following the installation requirements carefully.
Most importantly, check the work while you can still see it.
About the Author:
Nicole Gil works with Wet Wall Works, an Australian supplier of bathroom and shower wall panels. With several years of experience in the wet-area installation sector, they write about practical bathroom construction and finishing decisions for homeowners planning a new build or renovation.