
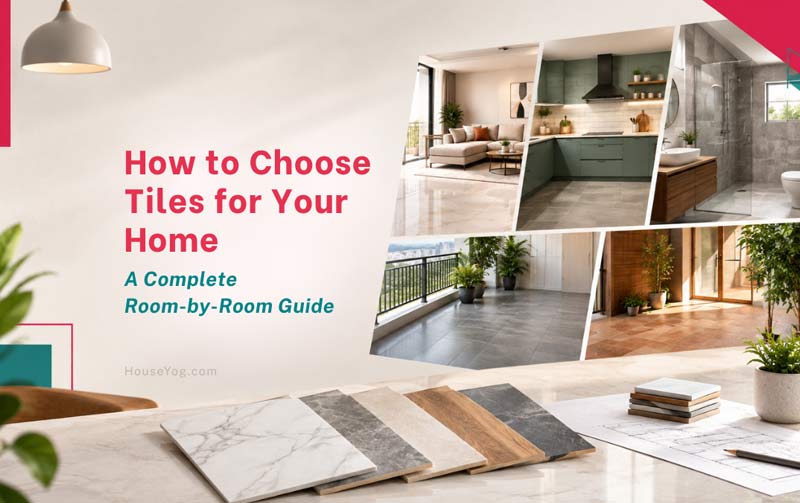

Choosing tiles for your home becomes much easier when you start with how each room will be used, rather than selecting a design simply because it looks attractive in a showroom.
A glossy marble-look tile may work beautifully in your living room, while the same finish could be unsuitable for a frequently wet bathroom floor. Kitchen backsplash tiles need to handle grease and regular cleaning, and balcony tiles must cope with rain, moisture and outdoor exposure.
If you’re building a new house or renovating an existing one, the practical approach is to choose tiles room by room, considering the surface, material, finish, size, maintenance and overall design together.
Today in this guide, we explain how to select floor and wall tiles for different rooms, compare products before buying, and avoid mistakes that can lead to unnecessary costs or problems after installation.
What to Consider Before Choosing Tiles
Before comparing colours and designs, identify where each tile will be installed and what it needs to withstand. A tile suitable for a dry bedroom floor may not be appropriate for a shower area or an exposed balcony.
Five considerations will help you narrow down your options.
1. Choose the tile according to its application
Floor tiles and wall tiles may look similar, but they aren’t automatically interchangeable. Floor tiles need to withstand foot traffic and the loads imposed by furniture and everyday use. Wall tiles can be lighter and are selected primarily for their intended application, appearance and ease of cleaning.
Check the manufacturer’s specifications to confirm that the product is suitable for the surface and location where you plan to install it.
For example, a decorative wall tile may look attractive behind a kitchen counter, but that doesn’t necessarily make it suitable for the kitchen floor.
2. Match the finish to the room’s use
Tile finish affects appearance, cleaning and how the surface performs under different conditions.
| Tile finish | Where it may work well | What to consider |
| Glossy | Living room floors in suitable dry areas, decorative walls and kitchen backsplashes | Reflects light, but can show footprints and may become slippery when wet. |
| Matte | Bedrooms, living rooms, kitchens and selected bathroom applications | Usually offers a more subdued appearance and can be practical for everyday use. |
| Textured or anti-skid | Bathrooms, balconies, utility areas and selected outdoor surfaces | Can improve grip, but deep textures may require more effort to clean. |
| Satin or semi-polished | Living rooms, bedrooms and other dry interior areas | Provides some sheen without the highly reflective appearance of a polished surface. |
A matte finish is not automatically slip-resistant, and a glossy finish is not automatically unsuitable for every floor. The actual slip performance depends on the product’s surface characteristics and intended application.
For bathrooms, balconies and other areas that may become wet, check the manufacturer’s slip-resistance information rather than relying on the finish name alone.
3. Select a tile size that suits the room
Tile size influences the visual appearance of a room, the number of grout joints and the amount of cutting required during installation.
Large-format tiles can create a more continuous floor with fewer grout lines. They can work particularly well in larger living rooms and open-plan spaces. Smaller formats and mosaics are useful in shower floors, curved areas, niches and surfaces that require more flexibility.
Don’t select a large tile just because it looks impressive in a showroom. The room’s dimensions, layout, floor slope and drain positions all affect whether the tile can be installed properly.
4. Consider maintenance and replacement
A tile that looks attractive on the day of installation should also remain practical to maintain.
Light-coloured, patterned or subtly textured tiles may conceal everyday dust and minor marks differently from dark, plain, highly polished surfaces. Grout colour also affects how clean a tiled surface looks over time.
Before finalising a design, check whether matching tiles are likely to remain available and keep a few spare tiles from the same batch for future repairs.
5. Plan the complete tile budget
The purchase price of the tile is only one part of your total cost. Adhesive, grout, waterproofing where required, cutting, laying, skirting, edge profiles and wastage can all affect the final installation budget.
If you’re comparing two tile options, compare their installed cost rather than just the price per square foot or per box.
How to Choose Tiles for Each Room
The right tile depends on what happens in the room, how much moisture the surface encounters, and the appearance you want to create. You can use the following room-by-room recommendations as a starting point, then confirm the product specifications and installation requirements before ordering.
1. Living Room and Drawing Room
For a living room, choose floor tiles that balance appearance, durability and everyday maintenance. Vitrified tiles are a common option for Indian living spaces because they are available in a wide range of designs and formats and generally have low water absorption.
Which floor tiles should you choose?
Marble-look vitrified tiles are popular for living rooms because they provide the appearance of natural stone with a wide choice of patterns and finishes. White, beige and light grey designs can help create a bright, open feel, particularly in rooms with limited natural light.
Wood-look tiles offer a warmer appearance and can complement contemporary, earthy or minimalist interiors. Stone-look and concrete-look tiles work well when you prefer a quieter, more understated design.
Large-format tiles can reduce the number of grout joints and create a continuous appearance across an open living and dining area. The format should still suit the room dimensions, door openings and adjoining spaces to avoid excessive cutting.
What about living room wall tiles?
If you plan to use tiles on a TV feature wall or behind a decorative panel, treat that surface separately from the floor. Stone-look, marble-look and textured decorative tiles can create a focal point without requiring the entire room to have a heavily patterned finish.
A useful design approach is to let one surface carry the visual interest. If the floor has prominent marble veining, for example, a simpler TV wall can help keep the room balanced.
For a deeper discussion of flooring materials, finishes and architectural selection considerations, see our guide on how architects choose flooring tiles for homes.
2. Bedroom
Bedroom tiles should create a comfortable visual environment while remaining easy to maintain. Since bedrooms generally experience less foot traffic than living rooms or entrance areas, you have more flexibility in choosing colours, patterns and finishes.
Which tiles work well in bedrooms?
Wood-look porcelain or vitrified tiles are worth considering if you want a warm, timber-inspired appearance without using natural wood flooring. Beige, cream, soft grey and muted stone-look tiles can also complement a wide range of bedroom furniture and wall colours.
For a small bedroom, a light or medium-toned tile with a restrained pattern can help the room feel less visually crowded. In a larger bedroom, you can consider more pronounced patterns or darker colours, provided they work with the natural light and furniture.
Matte or satin finishes are practical choices if you prefer a softer appearance. A polished tile can also work in a dry bedroom, but consider how easily it shows dust, footprints and scratches.
Should you use the same tiles in every bedroom?
You can use the same floor tile across bedrooms and adjoining passages to create visual continuity and simplify material procurement. Alternatively, you can introduce a different tile in a main bedroom if the design calls for it.
The decision should be made alongside the overall flooring layout. Changing tile types between adjacent rooms can introduce additional transitions, cutting and material requirements.
3. Kitchen
Kitchen tile selection involves at least two separate decisions: the flooring and the wall tiles above the countertop. Each surface has different requirements.
Kitchen floor tiles
Choose a floor tile that can withstand regular foot traffic, food spills, cleaning and occasional water exposure. A suitable vitrified tile with a practical finish is commonly used in residential kitchens.
Matte or appropriately textured surfaces can be useful in kitchens where water and oil spills are possible. Check the actual slip-resistance information for the product, especially if the kitchen is likely to be wet during regular cleaning.
Avoid selecting an extremely rough floor tile solely for its grip. Deep surface textures can trap grease and dirt, making routine cleaning more difficult.
For colour, medium tones and subtle patterns can be practical because they may conceal everyday dust and minor marks more effectively than very dark, plain surfaces.
Kitchen backsplash and wall tiles
The backsplash is the wall surface between the countertop and the overhead cabinets or other upper wall finish. It is exposed to cooking splashes, grease and frequent cleaning, so the tile should have a surface that is easy to wipe down.
Glossy ceramic wall tiles are one option. They are available in many colours and patterns and can work well behind the sink or cooking counter. Larger wall tiles with fewer grout joints can also simplify cleaning.
If you’re considering patterned, handmade-look or three-dimensional tiles, think about the location. Highly textured tiles may look attractive on a feature wall but can be less convenient directly behind a cooking hob.
For a coordinated kitchen, select the countertop, cabinet finish, backsplash and floor together. A busy backsplash paired with heavily patterned flooring and prominent countertop veining can make the space feel cluttered.
4. Bathroom
Bathroom tiles need to handle repeated water exposure, cleaning and changes in moisture. Choose floor and wall tiles separately, with particular attention to slip resistance, waterproofing and drainage.
Bathroom floor tiles
For the bathroom floor, select a product specifically suitable for wet-floor use. A matte or textured finish with appropriate slip-resistance characteristics is generally preferable to a highly polished surface in areas that become wet.
Small-format tiles or mosaics can be useful in shower areas because their additional grout joints can help accommodate the floor slope around a drain. The tile itself, adhesive, grout and waterproofing system must still be suitable for the application.
If your bathroom has a separate shower area, consider whether the floor needs to be divided into wet and dry zones. The slope towards the drain, drain location and tile format should be coordinated before laying begins.
Bathroom wall tiles
Bathroom walls offer greater flexibility in colour, pattern and finish because they do not carry the same foot-traffic requirements as the floor.
Large-format ceramic or vitrified wall tiles can create a cleaner appearance with fewer grout joints. Marble-look tiles are popular for shower walls and vanity backgrounds, while contrasting or decorative tiles can be used to distinguish a shower niche or feature wall.
You can use lighter wall tiles to create a brighter appearance in a compact bathroom. Darker tiles can work well in larger bathrooms or as accents, particularly when balanced with suitable lighting and fittings.
Remember that tiles and grout are not a substitute for a properly designed waterproofing system. Waterproofing, floor slope, drainage and correctly sealed junctions must be addressed before the tiles are installed.
For more detailed cost planning, refer to our guide on bathroom tile costs.
5. Balcony and Outdoor Areas
Balcony and outdoor tiles must be selected for exposure to rain, sunlight, moisture and temperature changes. A tile designed for a dry interior floor may not be suitable for an exposed balcony or terrace.
Which tiles are suitable for balconies?
Look for floor tiles specifically rated for exterior use and with appropriate slip resistance for the expected wet conditions. Textured vitrified tiles and outdoor-rated porcelain tiles are options worth comparing.
The degree of texture matters. A surface that provides grip while wet should still be practical to clean, particularly in balconies exposed to dust, pollution and rainwater.
For a covered balcony, you may have more flexibility in design, but the tile still needs to suit the actual exposure and drainage conditions.
Don’t overlook drainage and slope
The floor should be planned to direct water towards the drain without leaving stagnant pockets. Tile size, slope, drain position and the location of door thresholds should be coordinated before installation.
Waterproofing below the tiles is equally important where the balcony sits above an occupied room or forms part of a protected building envelope.
For outdoor walls, choose products specified for exterior applications and suitable for the substrate and fixing system. Large or heavy-format tiles may require particular attention to mechanical fixing or the manufacturer’s installation recommendations.
6. Entrance, Staircase and Passage
Entrances, staircases and passages experience repeated movement, footwear, dust and sometimes water brought in from outside. Choose tiles based on wear, grip, ease of cleaning and the detailing required at edges and changes in level.
Entrance and passage tiles
For the entrance, a durable floor tile with a suitable finish is a practical choice. Stone-look and medium-toned designs can work well in areas where dust and footwear marks are common.
If the entrance opens directly into the living room, consider whether the same tile should continue through both spaces. Continuing the same flooring can make the interior appear more open, while a different entrance tile can help define the transition.
Staircase tiles
Staircases require more care than ordinary floor areas. The tile needs to be suitable for the application, and the nosing or edge detail must be planned to provide a safe, durable finish.
Avoid choosing a polished tile for stair treads without checking its slip performance and suitability for stair use. Also confirm that the tile dimensions allow the tread and riser to be finished neatly, without narrow or uneven cut pieces.
For a consistent appearance, coordinate the staircase tile with the adjoining floor, skirting and landing. If you’re using a different material for the stair treads, check how its colour and thickness work with the floor tile at both ends.
7. Pooja Room
For a pooja room, tile selection is largely a matter of coordinating the floor and wall finishes with the mandir, lighting and overall interior design.
Light-coloured marble-look tiles, subtle stone patterns and simple ceramic wall tiles can create a calm background for the pooja unit. Decorative tiles can also be used behind the mandir as an accent, particularly when the rest of the room has a restrained finish.
If the pooja area is integrated into the living room, coordinate its floor and wall tiles with the surrounding flooring. A separate raised platform or change in floor level should be planned carefully to avoid awkward edges or trip hazards.
Choose finishes that are easy to clean and suitable for the intended surface. Where lamps or other sources of heat are used, follow the tile and installation product recommendations for the surrounding surfaces.
How to Match Tile Size, Colour and Finish Across Your Home
Once you’ve shortlisted suitable tiles for each room, the next step is to make sure they work together. You don’t need to use the same tile throughout your house, but the colours, patterns and finishes should feel related rather than randomly selected.
Choosing the right tile size
Tile size should be selected according to the room’s dimensions, layout and intended application.
| Tile format | Where it can work well | Practical consideration |
| Small-format tiles and mosaics | Shower floors, niches, decorative walls and curved surfaces | More joints and cutting may be involved, but smaller pieces can accommodate slopes and irregular shapes. |
| Medium-format tiles | Bedrooms, kitchens, passages and many bathrooms | Often provide a practical balance between handling, cutting and visual appearance. |
| Large-format tiles | Living rooms, large bedrooms and spacious wall surfaces | Fewer joints, but the substrate must be suitably prepared and the installation planned carefully. |
| Plank-format tiles | Wood-look flooring, feature walls and selected passages | The laying direction and joint alignment influence the final appearance. |
For example, a 600 x 1200 mm tile may work well on a large living room floor, but the same format may require careful planning in a compact bathroom with several drains, corners and wall niches.
The tile layout should be checked against the actual room dimensions before ordering. A small adjustment to the starting point can sometimes reduce narrow cuts around doorways and visible edges.
Coordinating colours and patterns
Start with the fixed finishes in your home: doors, windows, kitchen cabinets, countertops, sanitary fittings and major furniture. Tile colours should complement these elements rather than compete with them.
If you prefer a marble-look floor with pronounced veining, consider simpler wall finishes in the adjoining spaces. For a neutral floor, you can introduce colour or pattern through a kitchen backsplash, bathroom feature wall or decorative niche.
You can also use a consistent colour family across different rooms while changing the tile format or surface pattern. For instance, beige floor tiles in a living room can coordinate with a lighter beige wall tile in a bathroom without requiring the same product everywhere.
Should you use the same tile throughout the house?
Using the same tile in adjoining dry areas can create visual continuity and may simplify procurement. It can be particularly effective across a living room, dining area and passage.
Wet areas and exterior spaces should be treated separately. A tile chosen for a dry living room may not have the required slip resistance or application rating for a bathroom or exposed balcony.
Rather than using one tile everywhere, aim for a coordinated selection that respects the functional requirements of each surface.
How to Compare Tile Quality Before Buying
Two tiles can look almost identical in a showroom but differ in their intended application, surface characteristics, dimensional consistency and installation requirements.
Before placing a bulk order, compare the product specifications and inspect the actual material you plan to purchase.
Check the material and intended use
Confirm whether the product is ceramic, vitrified, porcelain or another tile type, and check the manufacturer’s recommended application.
For floor tiles, look at the relevant performance specifications, including water absorption, wear suitability and slip resistance where applicable. For wall tiles, check that the product is designed for the intended wall application and that the recommended adhesive and fixing method are suitable.
Don’t rely on a salesperson’s description alone. The product catalogue, packaging and technical data sheet should identify the intended use and relevant specifications.
Check the shade, calibre and batch
Tiles are manufactured in batches, and slight variations in colour, dimensions and appearance can occur.
Before installation, check that the boxes supplied for the same area have consistent shade and calibre markings. Where possible, inspect tiles from several boxes together under suitable lighting.
For patterned tiles, also check the design variation and repeat pattern. A natural stone-look product may intentionally have considerable variation, while another design may be intended to appear more uniform.
If you’re ordering tiles in stages, confirm whether the same batch can be supplied later. Keep a record of the product name, size, shade and batch details.
Inspect samples in your actual space
A tile can look quite different under showroom lighting compared with the natural and artificial light in your room.
Take samples home where possible and view them at different times of the day. Compare the tile against the actual wall colour, countertop, cabinetry or other finishes that will remain in the room.
For glossy or highly patterned tiles, viewing a larger sample or several pieces together can help you understand the reflection, veining and overall appearance better than a small display sample.
Compare the complete installed cost
A lower-priced tile isn’t necessarily the lower-cost option once installation is considered.
Large-format tiles may require a more carefully prepared substrate and suitable handling equipment. Intricate patterns, diagonal layouts, multiple tile sizes and decorative borders can increase cutting and labour requirements.
Ask for a quotation that distinguishes the material cost from the installation and associated materials. This makes it easier to compare options without overlooking adhesive, grout, skirting, edge profiles or wastage.
Tile Buying Checklist Before You Place an Order
Use this checklist when you’re finalising tile selections with your supplier, architect or contractor:
- Confirm the tile is suitable for the intended floor or wall application.
- Check the product size, finish, technical specifications and manufacturer’s installation instructions.
- Review samples in your actual room lighting and alongside other fixed finishes.
- Calculate the required quantity, including cuts, layout and an appropriate wastage allowance.
- Confirm shade, calibre and batch consistency across the supplied boxes.
- Include adhesive, grout, skirting, edge profiles and installation labour in your budget.
- Check delivery timing and availability of additional tiles if replacements are needed.
- Keep spare tiles and record the product name, size, shade and batch details.
Final Thoughts
Choosing tiles is easier when you separate the decisions: first identify what each surface needs to handle, then shortlist suitable materials and finishes, and finally coordinate colours, sizes and patterns across your home.
You don’t need the same tile in every room, nor does a higher price automatically guarantee a better choice for your project. What matters is selecting a product suited to its application, checking its specifications and planning the installation properly.
If you’re still comparing options, start with the rooms that have the most demanding requirements, such as bathrooms, kitchens and exposed balconies. Once those selections are clear, coordinating the remaining floor and wall finishes becomes much simpler.
At Houseyog, our architectural design and consultation services can help you plan your floor layouts, material selections and interior finishes together before construction or renovation work begins.